
Topology is a branch of mathematics that studies how objects keep their properties, even when transformed. This could include stretching, bending, or deforming. It focuses on the connection, continuity, and proximity between points.
Topology has diverse applications across fields like physics, biology and computer science. It also plays a fundamental role in 3D design and animation. This is particularly true for character modelling, where proper topology is crucial to achieving high-quality results. When you begin learning 3D, you encounter topology from day one, but mastering its complexities can take many years. Only after working with several studios and actively studying this topic have I begun to understand what good topology should look like. I have been on this journey for over ten years and I am happy to share some of the tricks I have learned so far in this blog post.
This project started as a learning exercise, but quickly evolved into an opportunity to create a base mesh that integrates all the essential elements I believe are key to achieving the ‘ideal’ topology. Aspirations for this project have continued to grow, and I am excited to announce that the final asset is now available to purchase at my online store.
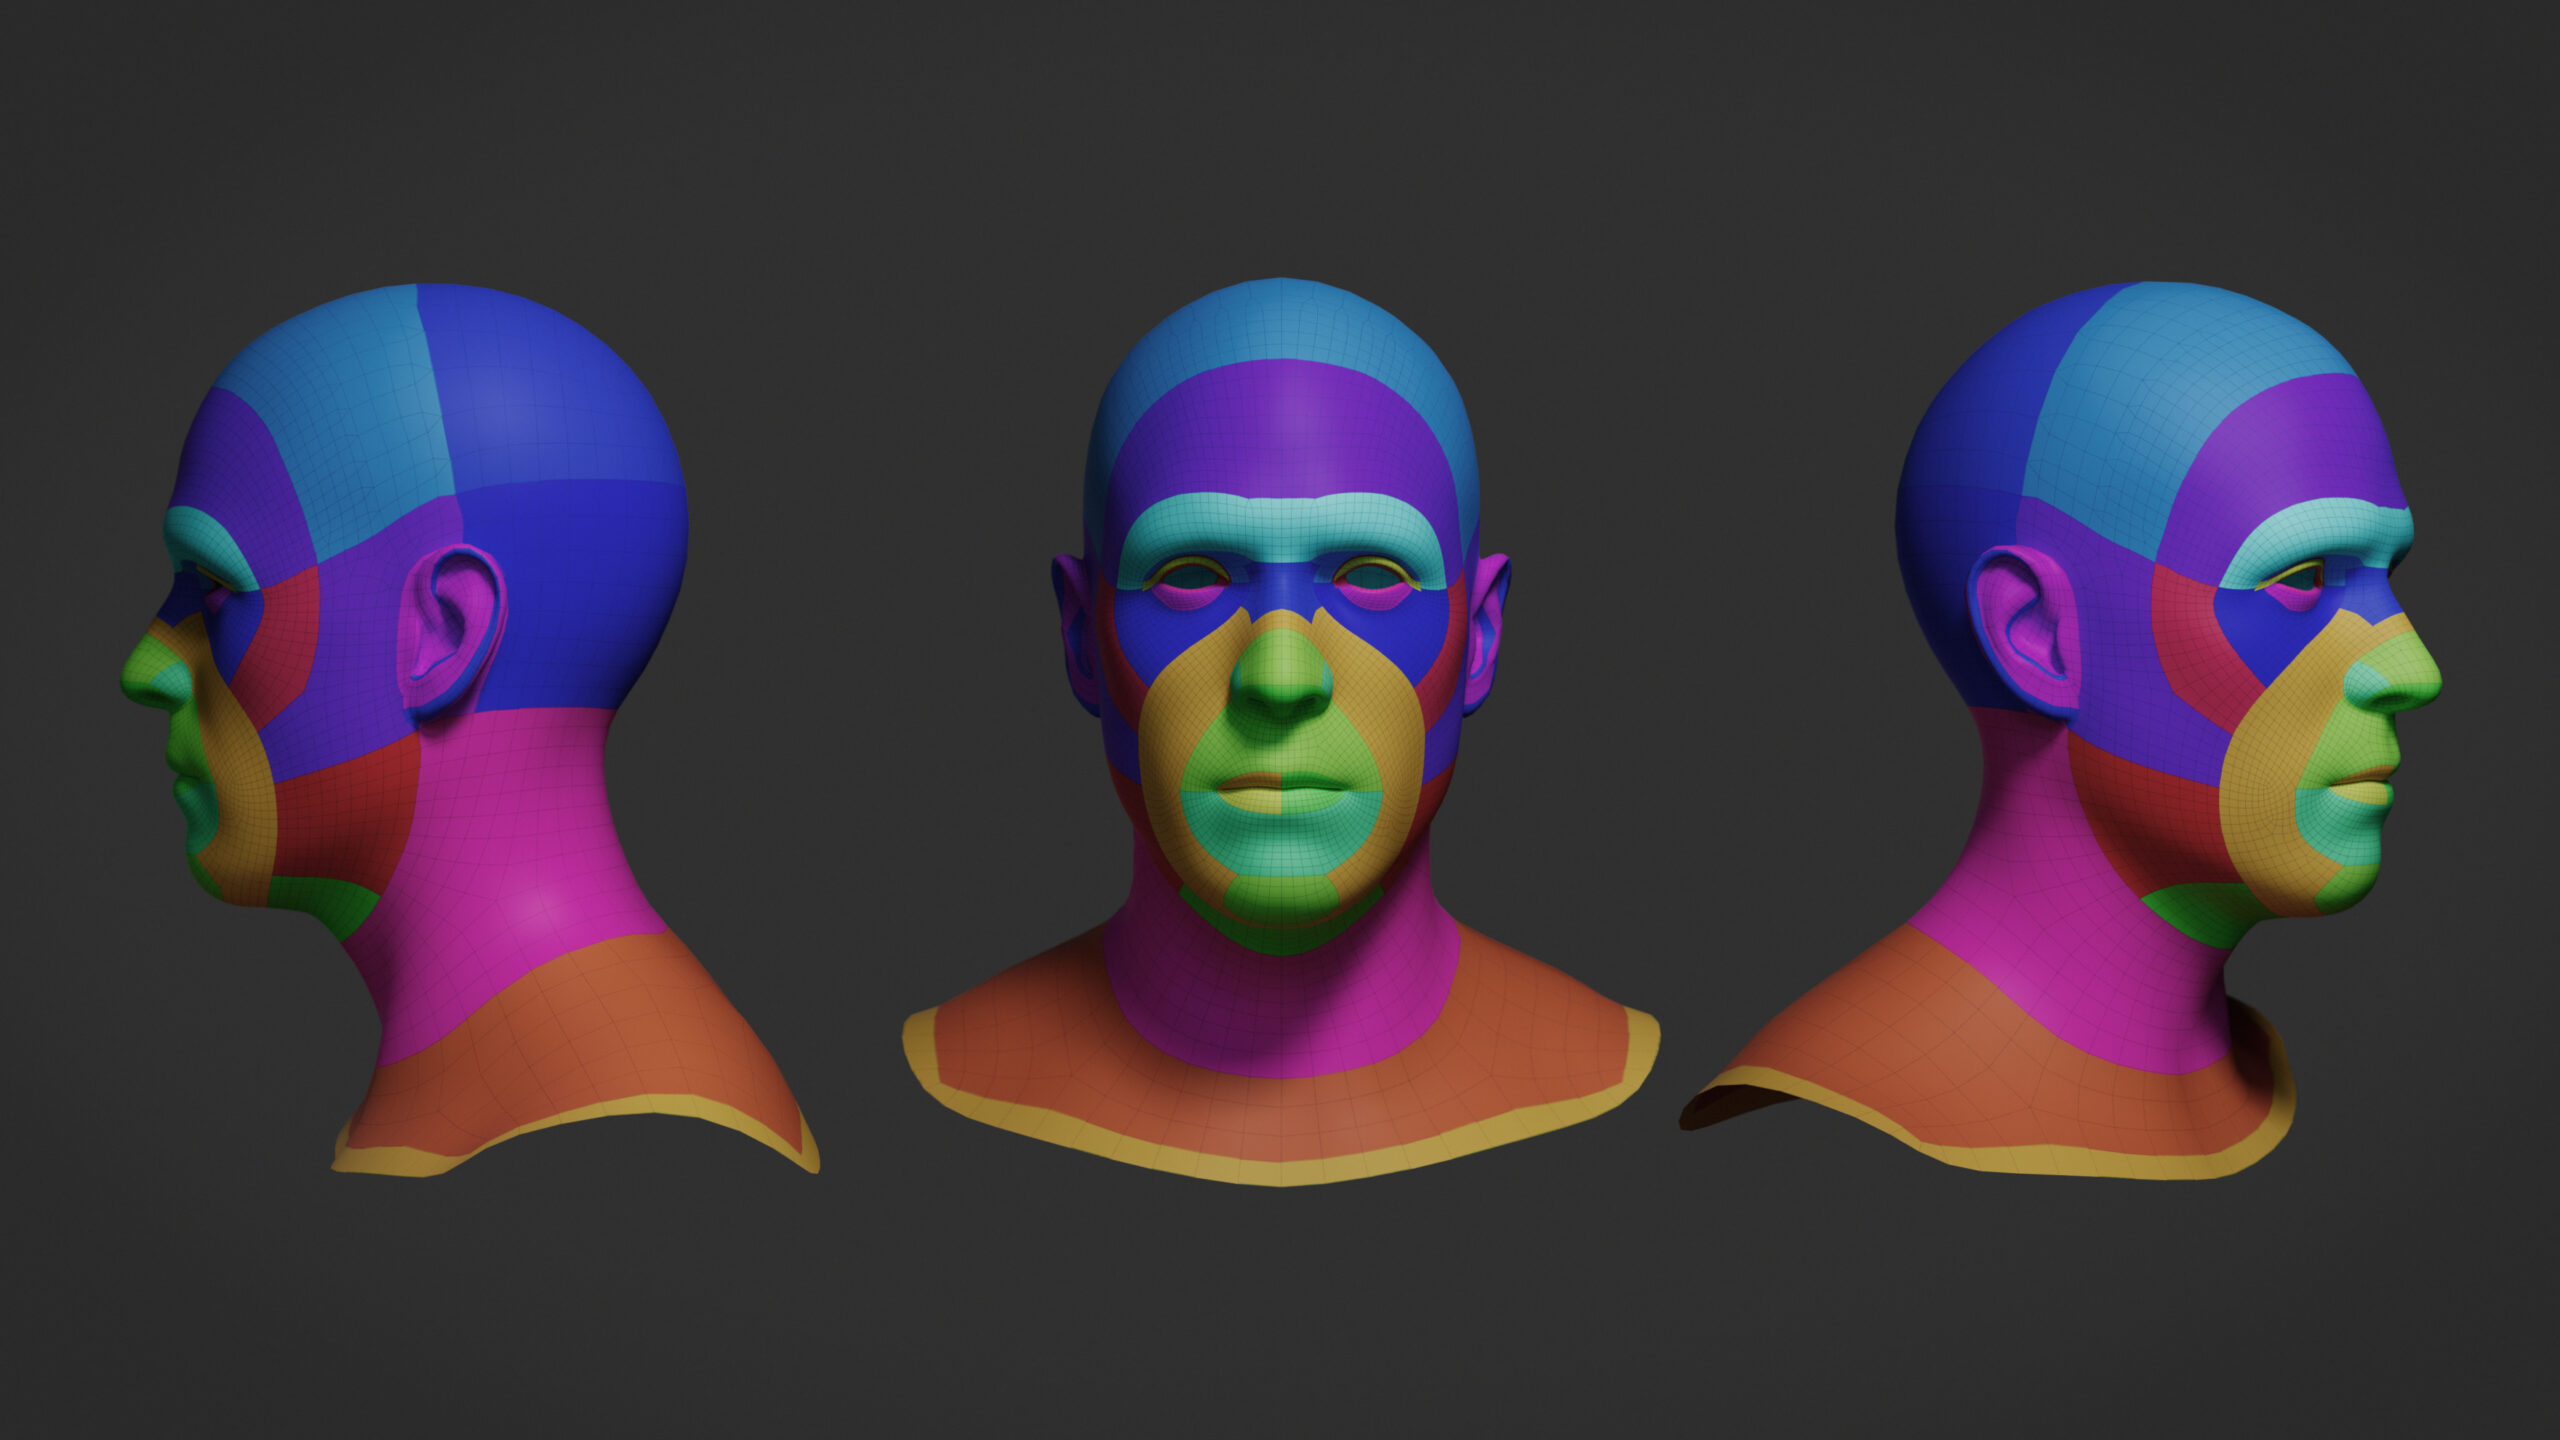
This base mesh is part of the ‘asHuman’ project. Sounds pretty similar another popular base mesh you may have heard of, only this one is tailored towards a specific set of priorities; facial resolution and good deformation being at the top of that list. In this blog post I will be explaining some of the thought processes behind making this topology and will be demonstrating some of the key features incorporated into its design.
Studying Reference
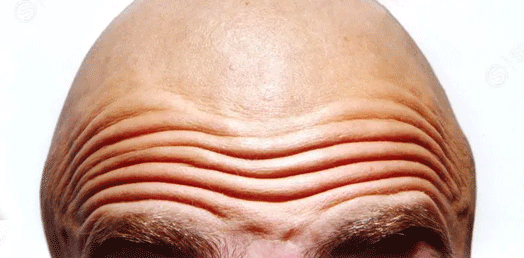
To begin with, I would like to focus on some reference for the upper half of the face. The wrinkle complexity of the forehead vs. cranium can be pretty extreme, especially with older faces. This contrasting difference can be imitated in the topology density of a base mesh to help with high poly sculpting and modelling facial deformation. Having extra topology in this area will help with older faces who have more static wrinkling, but also younger faces with dynamic wrinkles that appear through expression.
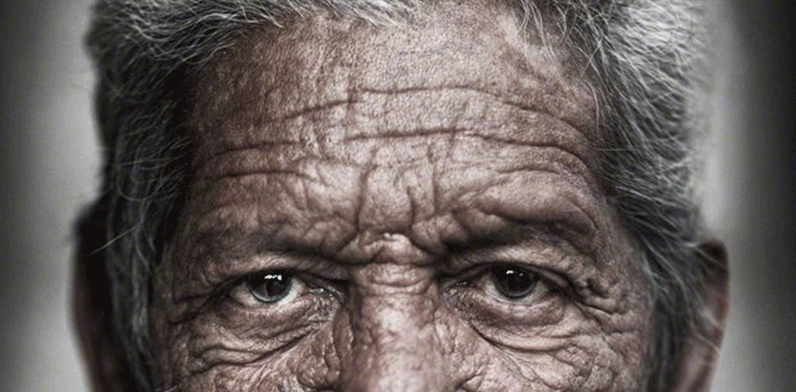
Another area where it is helpful to have extra resolution flowing along key wrinkle lines is the eyes; specifically the crows feet. Below you can see some images demonstrating the flow I would like to imitate and how complex that area of the face can become with age, or through expression. Following these keylines in the topology will be especially useful for sculpting wrinkles, or creating facial blendshapes.

The third area of the face I would like to focus on is the mouth – specifically the mouth corners. It is good to separate the flow in the topology at the mouth corners, so the upper and lower lip are represented as two individual forms. This will help a great deal when modelling blendshapes, as it prevents the mouth corners from rounding off so easily during more extreme expressions.
See below some examples of this in real life – a few photos for you to look at over breakfast.
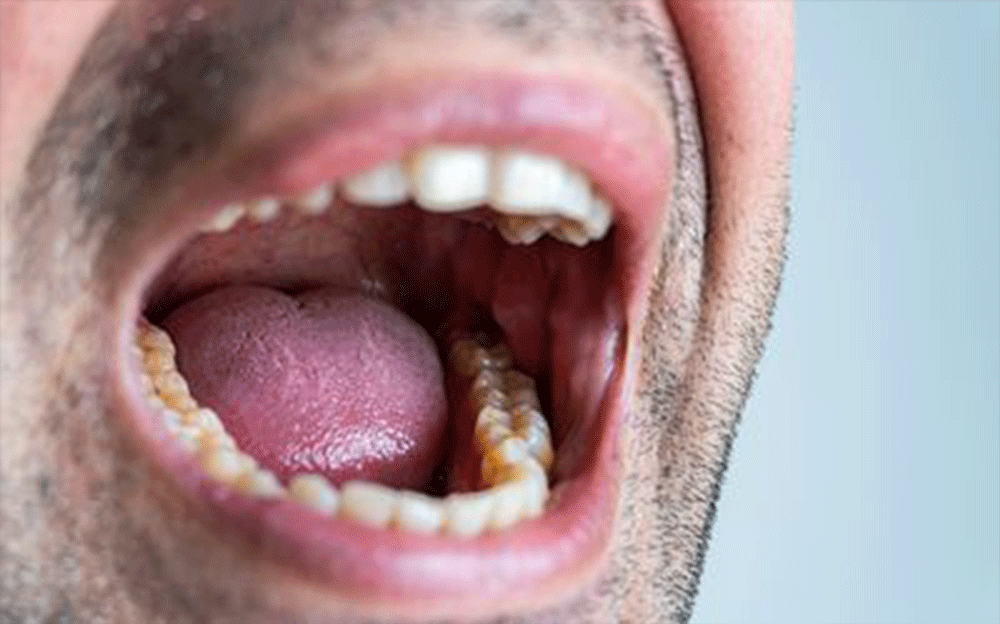
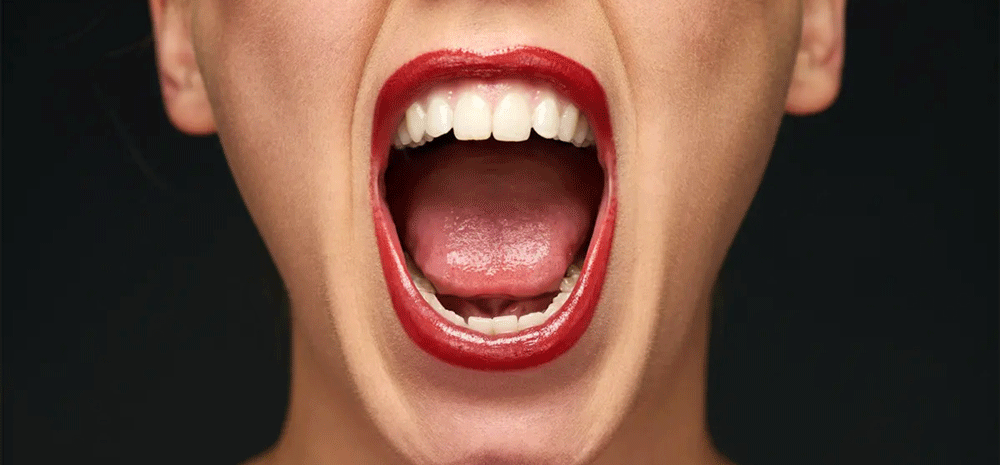
Even when the lips are fully stretched you can still see the separation between the upper and lower section (above).
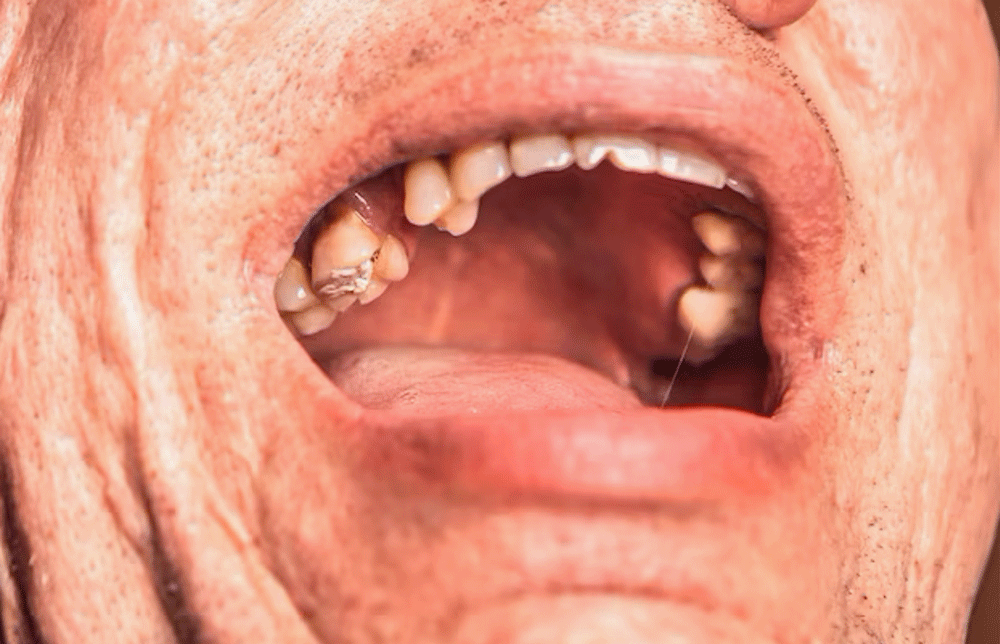
This view is really helpful (bellow) as you can clearly see how the upper lip transitions into the mouth corner.
Studying Existing Topology
The ‘Perfect’ topology is a fairly subjective concept, and the preferred specifications for a base mesh can vary from person to person, or which pipeline is being used. With this in mind, I decided to look at some existing base meshes in the hope to incorporate some of the best features into the asHuman topology.
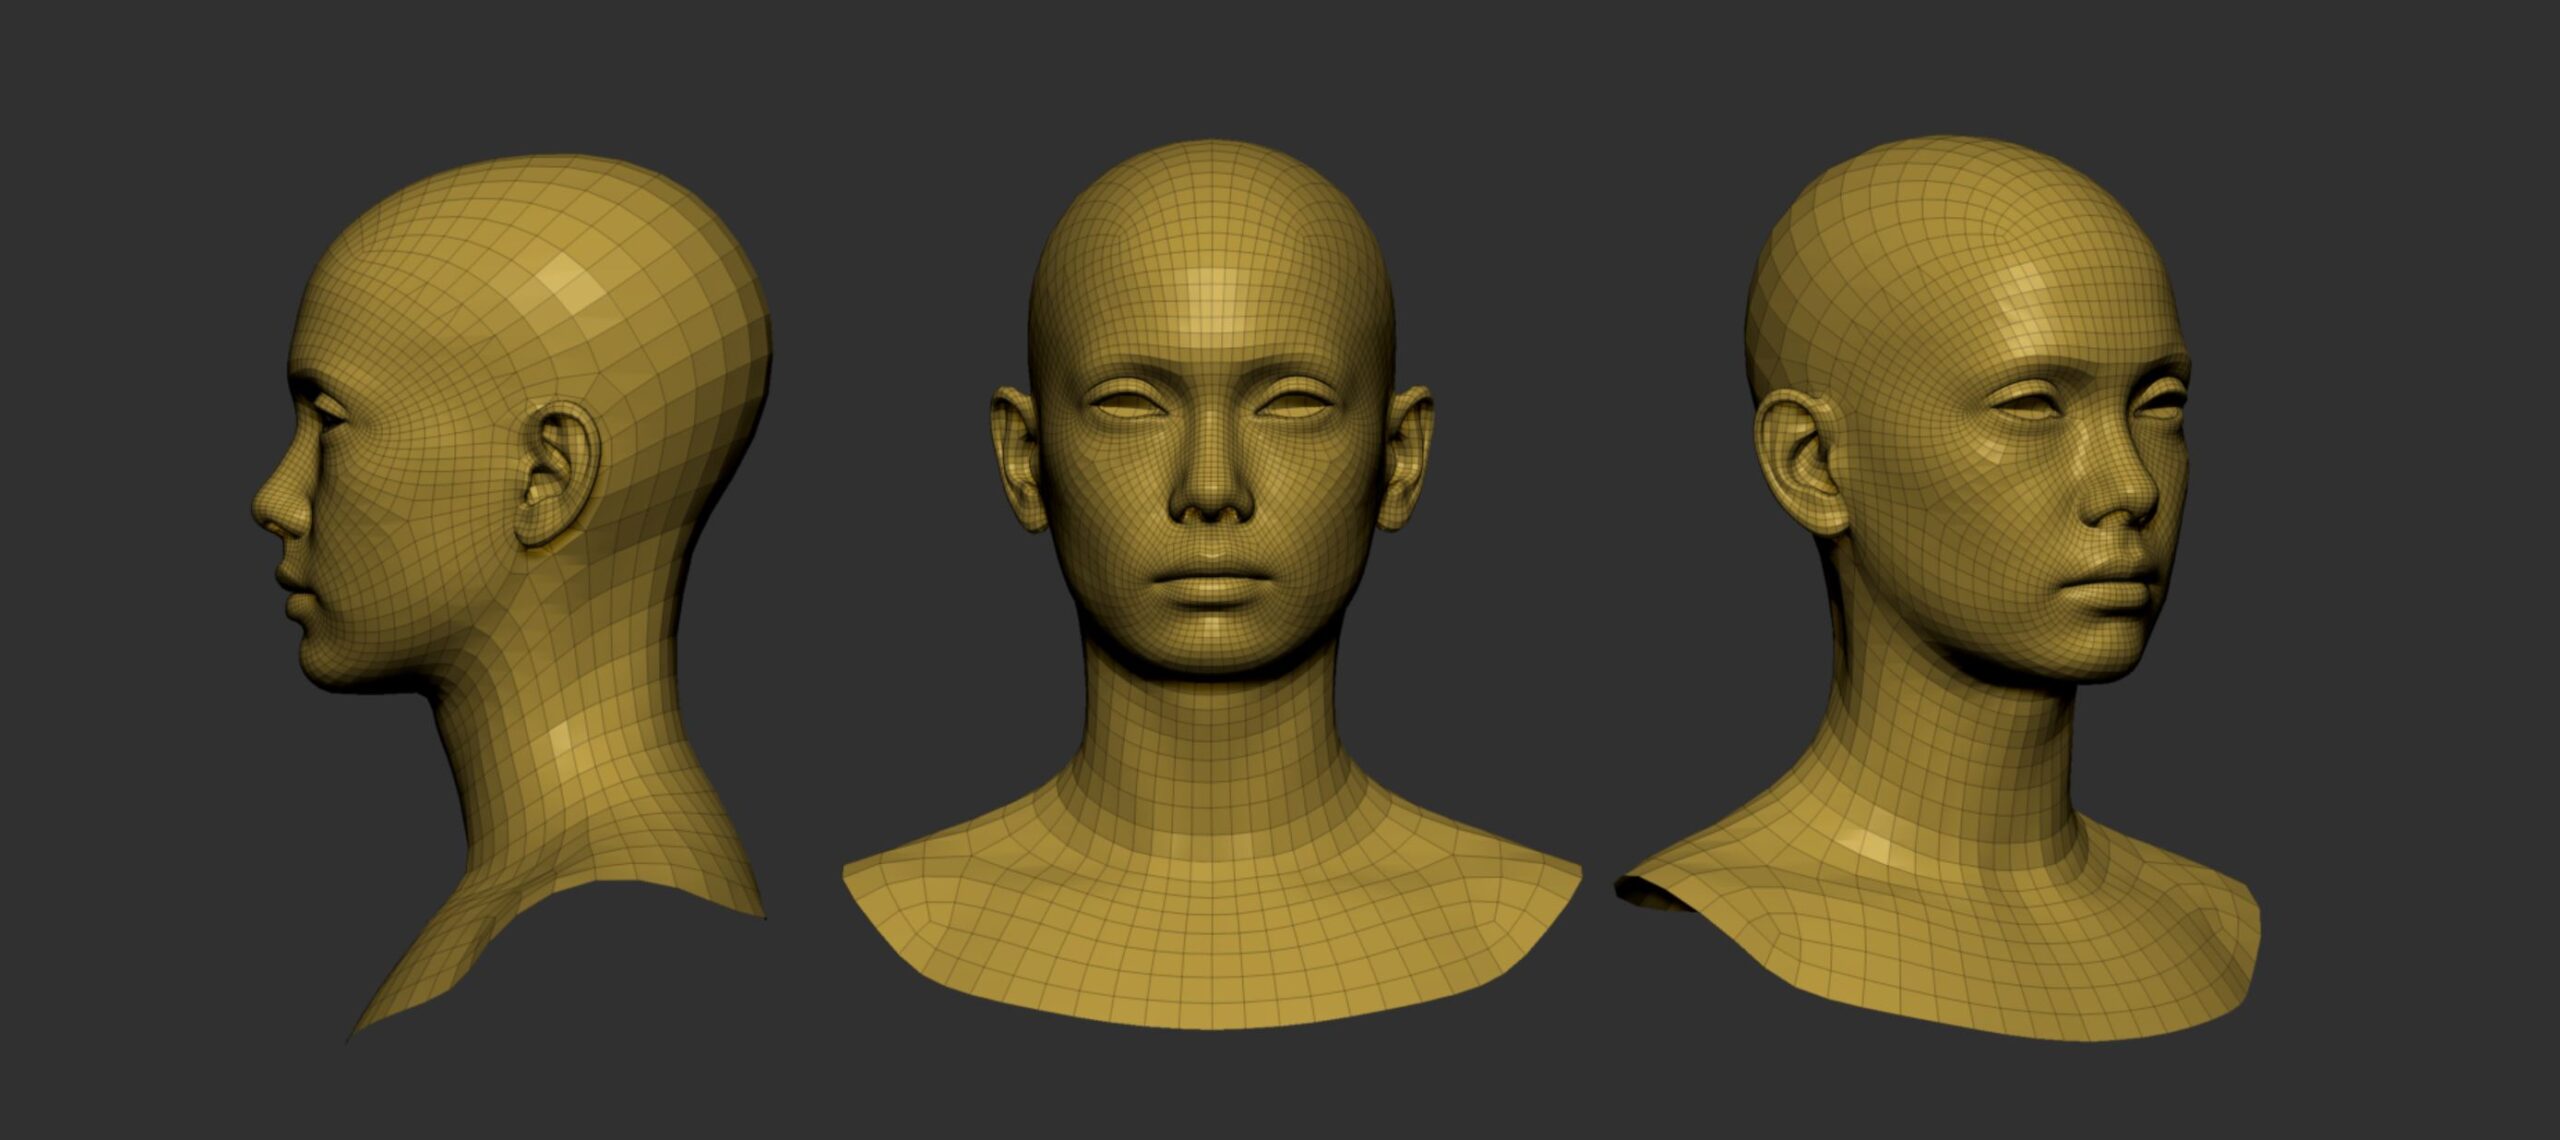
The base mesh above is made by 3Lateral for the Metahuman pipeline. It is really clean and has loads of nice flow to it. Arguably I could have saved myself a lot of time and just used the Metahuman topology for all my personal projects. Instead I decided to build my own, as not only would it be a good opportunity to learn, but also it would be an asset I could use on any project without restrictions.
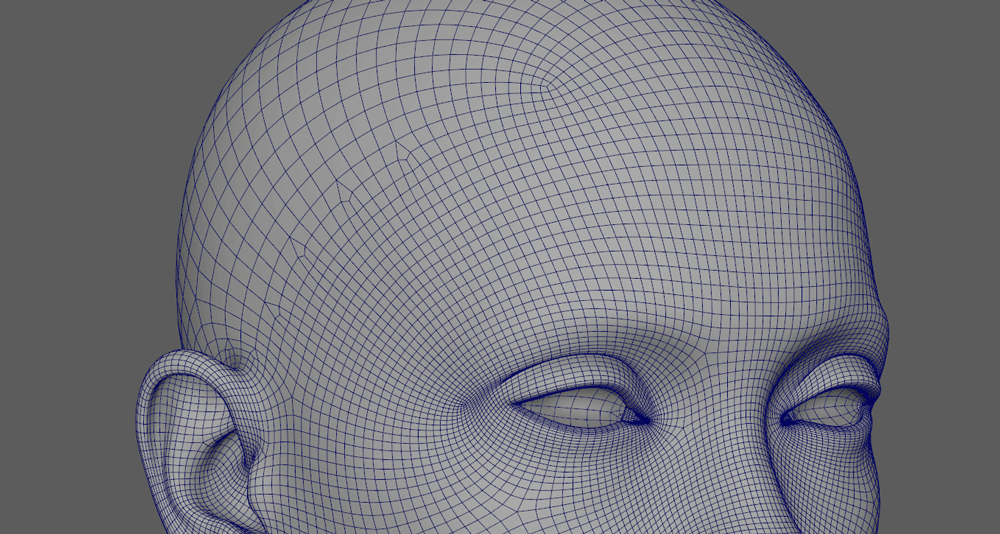
As shown in the photo reference earlier, we are aiming to force more resolution to the front of the head than on the top (or back). A technique to achieve this is to use triangles to split edge flow, which sends more resolution in one direction but not the other. In the Metahuman topology (above), you can see where four triangles have been subdivided, which maintains a low density at the back of the head, but sends additional resolution towards the front, where more complex resolution is required. This technique works really well in the Metahuman, however for the asHuman topology I will be taking a slightly different approach to where the triangles are placed. My preference would be to concentrate even more resolution towards the front of the head – especially the forehead area.
Another look at the Metahuman, focusing on the mouth corners this time (below). You can see there is separation between the upper and lower lip; similar to what was demonstrated in the photo reference earlier. This is another really nice feature which will be incorporated into the asHuman topology.

The last base mesh I want to study is another one made by myself. This topology has been used on most of my personal projects over the past five years. It has served me pretty well, however the main issue is that the resolution distribution is not well optimised. Also, it lacks some of the key flow lines that I demonstrated earlier in this post.
Below you can listen to a short edit of me discussing what worked, and what didn’t, in my old topology.
Creating the asHuman Head Topology
See below a time-lapse of creating the asHuman head topology.
Key features of the asHuman head mesh:
- Edge splitting at the top of the forehead, behind the ears and inside the mouth cavity to favour resolution around the front of the face – the area we look at the most
- Key flow lines around the eyes, across the forehead and around the mouth to help with complex wrinkle patterns
- Mouth corner topology split for upper & lower lips with spacing in between – to help avoid mouth corners rounding off when modelling blendshapes with the jaw open
- Vertical lines in the centre of the brow area for key wrinkles activated by the corrugator (frowning) muscles
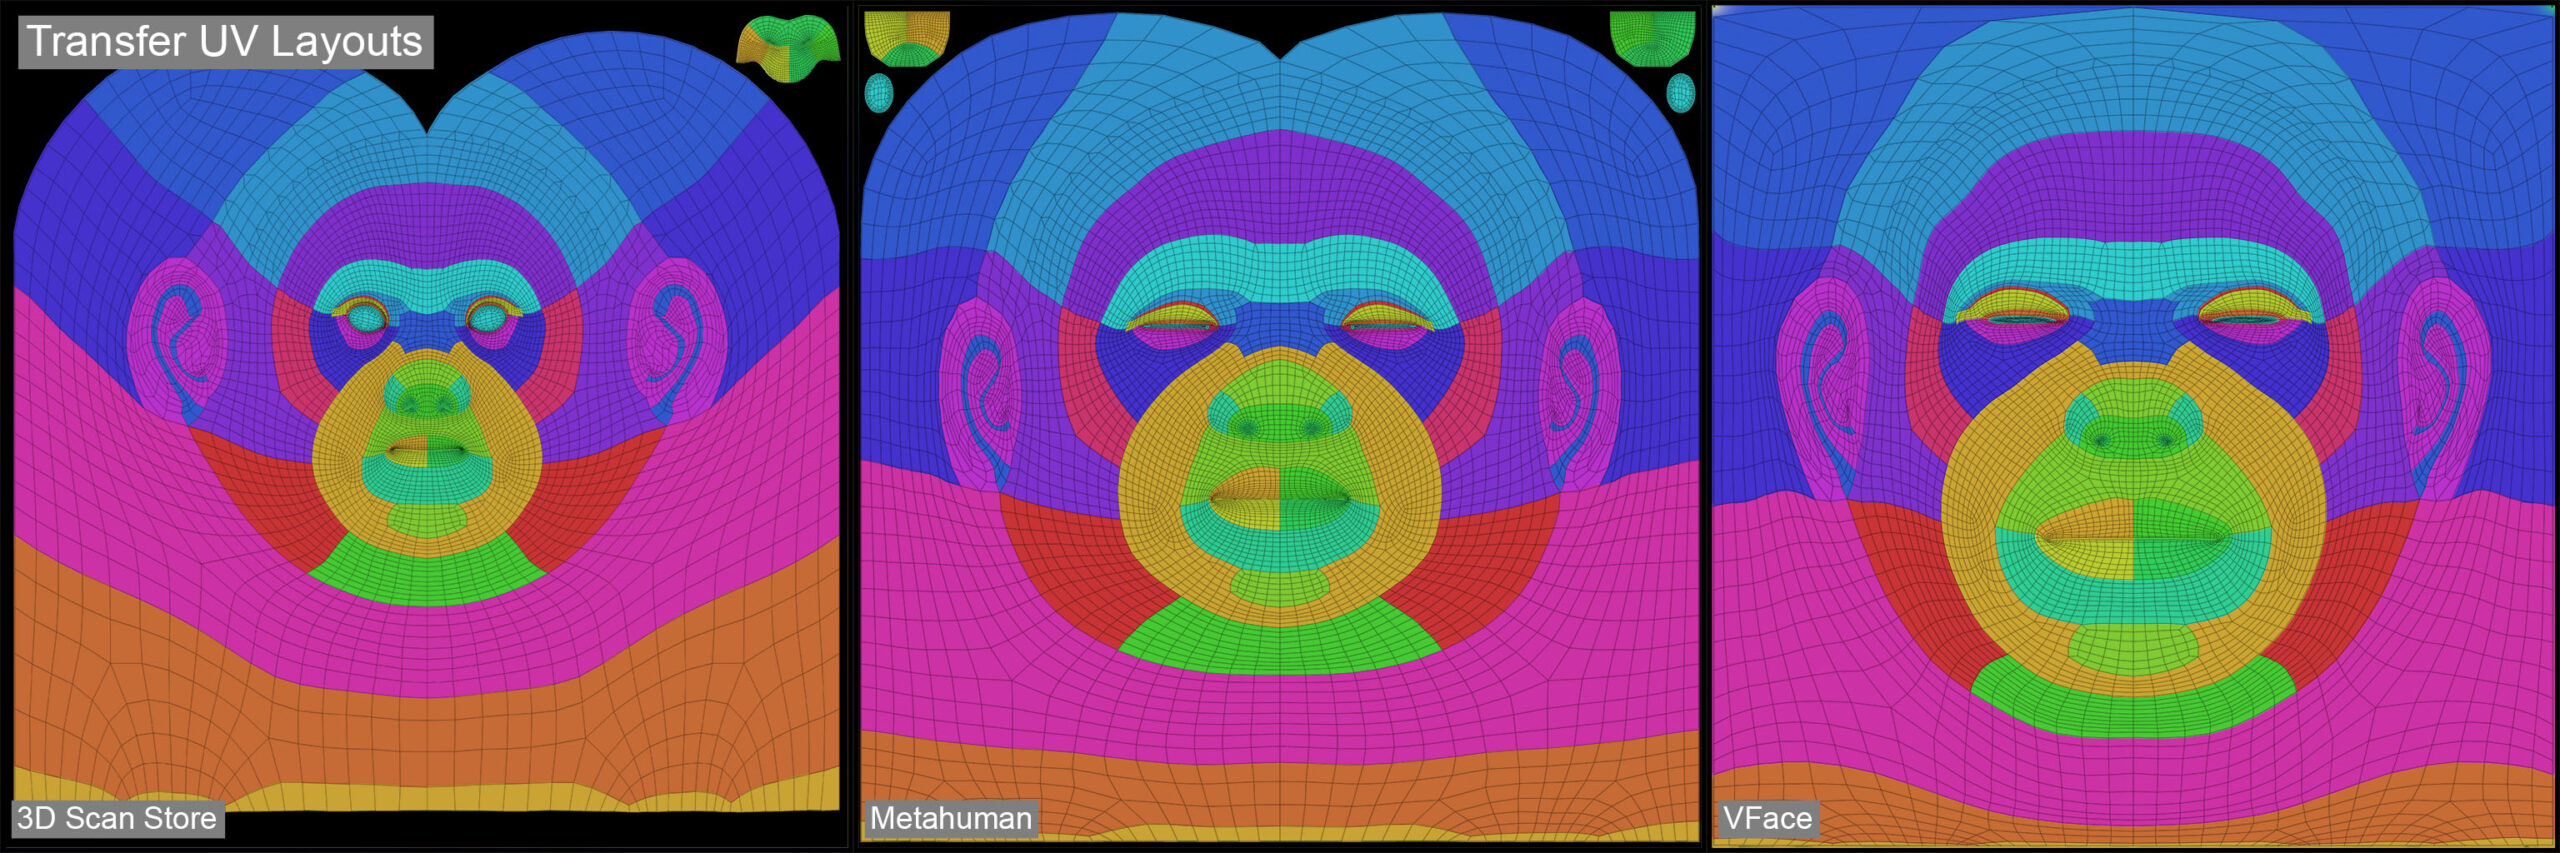
- Multiple transfer UV sets; compatible with Metahuman, 3D Scan Store and VFace
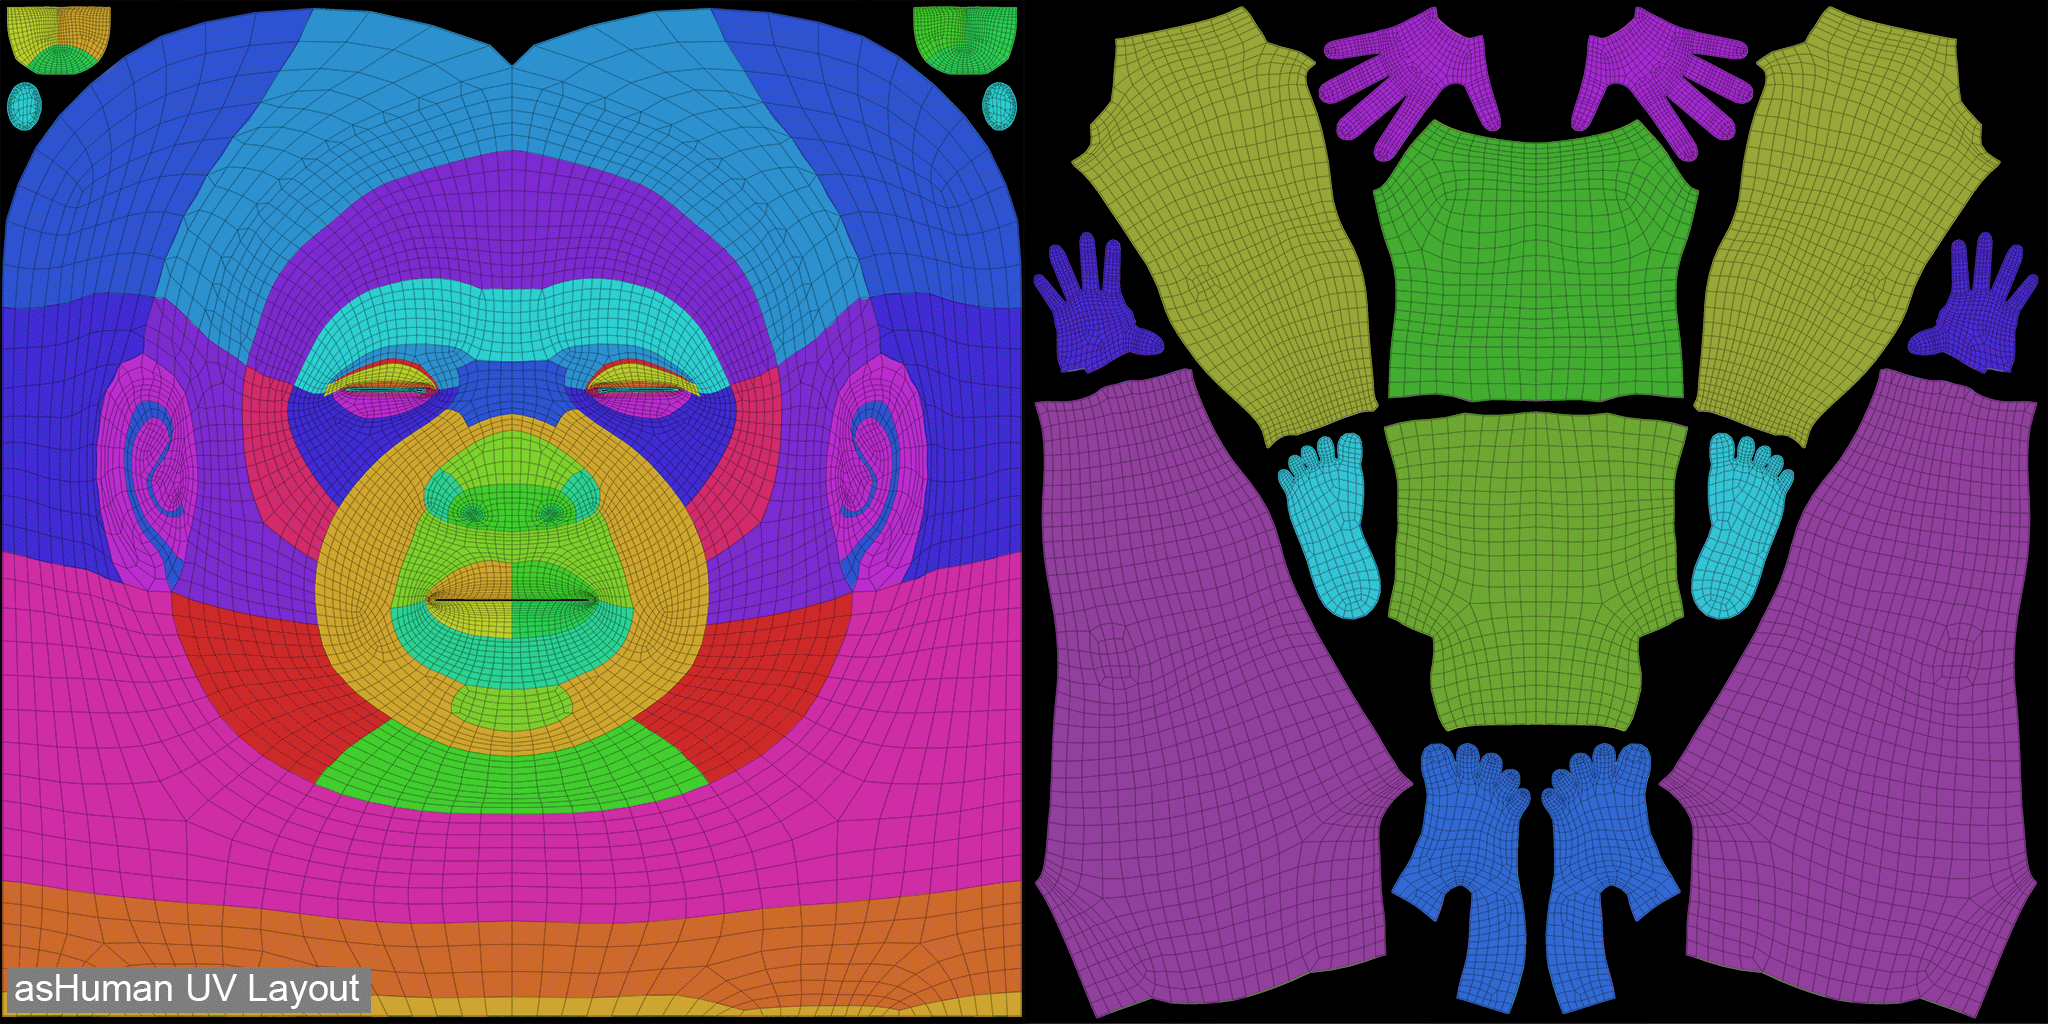
A brief mention on the UVs. The head mesh includes four UV sets; the first of which is the asHuman layout, which is pretty similar to the Metahuman, but with some variation along the borders. The other three (see below) are closely matching Metahuman, 3D Scan Store and VFace layouts. This means the head mesh will be compatible with all textures and shaders built for any of those three pipelines. You also have the option to easily transfer texture maps across from one to the other i.e. 3D Scan Store > asHuman, or VFace > asHuman, etc. There will likely be more UV sets added to this list in future versions of the base mesh, so feel free to make requests if you are considering purchasing the topology.
Another useful trick that you can use when your topology shares a matching UV set with another base mesh, is you can very quickly wrap one model to another using a tool such as the ‘Transfer Attributes’ option in Maya. This is much faster than most other geometry wrapping methods, however it is only possible if you have the correct matching UV sets. See below a video with a short demonstration of this technique.
Conclusion
As far as research goes, I have been lucky to work with a number of top studios and get used to various styles of topology across different pipelines. Much of the knowledge I have gained over the years has contributed to the design of the asHuman base mesh. As a result, I am confident in the quality of the work and that it meets industry standards.
I have really enjoyed working on this project and am looking forward to continuing to develop it further in the near future – there are already many ideas in the pipeline. If you would like to see a more informal breakdown of how the base mesh was made, you can visit the instagram highlight here.
For this project, I would like to credit my former colleague from MPC, Jake Harrell. I learnt a great deal from him over the last couple of years; facial pipelines in particular. Please do check his work out if you haven’t already.
See below a turntable of the asHuman head & body topology.
Before releasing this base mesh, I wanted to ensure it was fully tested within a character pipeline. I used this topology on one of my more recent characters as an example piece. The requirements for this project included; high-poly sculpting, grooming, blend shape modelling and facial animation. To see examples from this character project, feel free to watch through the highlight on my instagram page.
The asHuman topology is now available to purchase on my new website store. Currently the head and body topology are the only items available, however there will be a collection of other assets and tools going up in the near future. One tool which I am particularly excited about is an auto rigging script for the asHuman body topology. Keep an eye out for more updates soon.
I hope that artists and studios will enjoy using the asHuman topology and can utilise all of its features. If you have any questions about the base mesh, please feel free to get in touch – hello@adamspring.co.uk
To visit my website store – click here.