
Facial Action Coding System’s (FACS) were originally a tool invented by Dr Paul Ekman for measuring facial expressions, or more accurately ‘an anatomical system for describing all observable facial movement and breaking down facial expressions into individual components of muscle movement‘. This tool, or ‘system’, has started to appear more and more frequently in 3D character pipelines; predominantly within visual effects and games production.
Over the past two years I have been working on character pipelines for clients such as Ubisoft and Activision, focusing specifically on the FACS pipeline. This kind of work would usually involve supervising an actor throughout a scanning session, processing the scanned data and preparing all the facial expressions so that they are ready to handover to a character rigger.
In this post I will attempt to replicate this FACS workflow using just a single camera to capture the scans. This technique is usually inaccessible to most, but I hope to prove that it can be affordable/achievable by anyone (providing you own a DSLR and the necessary software). For those who are reading my blog for the first time, guerrilla scanning techniques have become a reoccurring theme, which is mostly due to the fact I don’t own all the expensive scanning equipment that would be used on commercial projects. For anyone who is not familiar, the ideal way to capture a non-static subject (i.e. a human) is to use a synchronised camera array, where multiple cameras all fire at the same time. It is unlikely that anyone would use just a single camera on a commercial shoot as there are many factors that may cause you to fail. Also, processing the models can be considerably more difficult as they require more careful treatment to preserve all the facial details.
FACS Scanning
To begin capturing the expressions I set up inside a white gazebo in the back garden to help create a controlled space. My partner kindly agreed to sitting in as a model, despite being slightly reluctant as it’s not the first time i’ve put her through all this. Also, it was mid January and minus two degrees outside! If you want a more in-depth explanation to single camera head scanning you can check out this post from last year where I focus on just the neutral expression. Also, I would recommend checking out Jeffery Ian-Wilsons video as there are a lot of good tips on there too.
See below setup and shoot time-lapse.
Processing
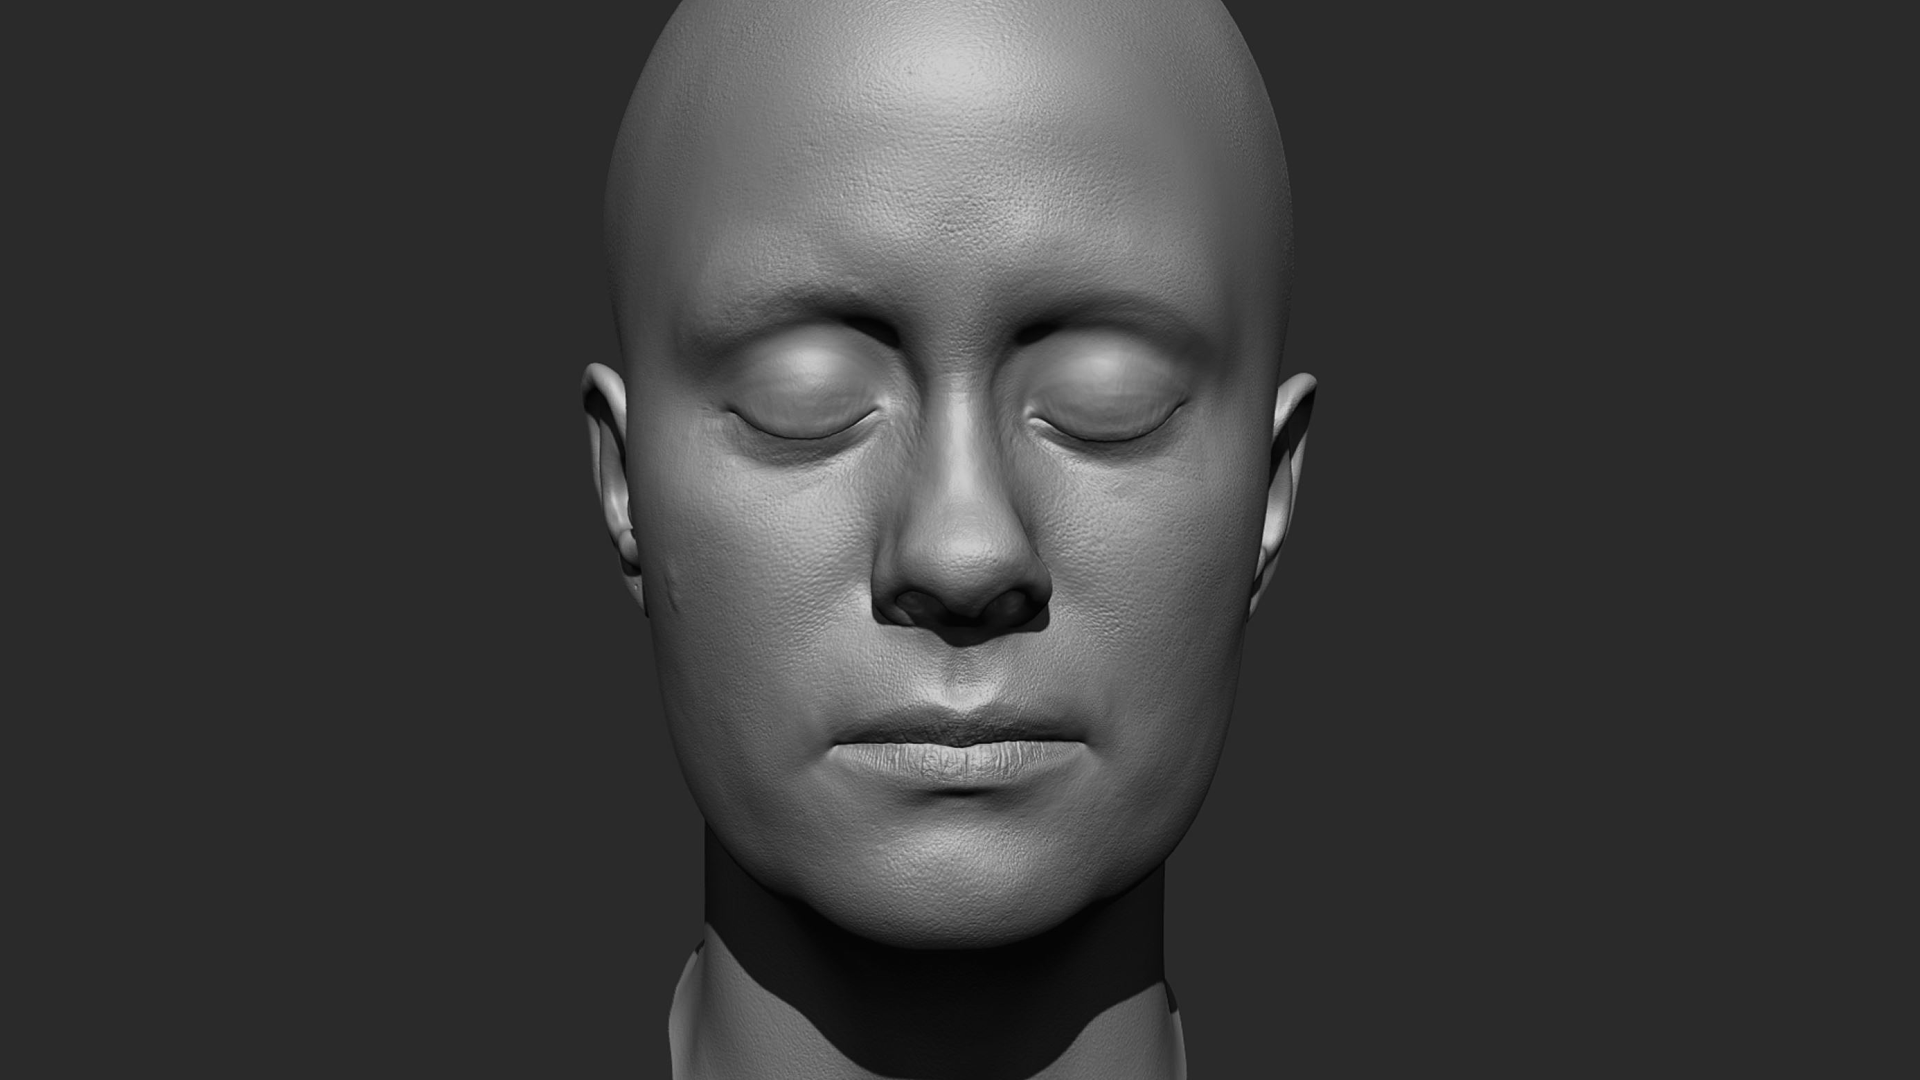
As you can see (image below) the models came out pretty messy, but for the purpose of this test, the data was good enough. As you might have noticed already I captured all her expressions with eyes closed to avoid blinking from the direct flash. For ‘eyes open’ I used a bounce flash off the top of the white gazebo. This was to use as a reference when rebuilding her eyes open in ZBrush.

Some of the expressions were quite challenging and not easy for her to hold; you can see in the image above which ones worked well. The expression second in from bottom right was just for fun, but did not work. I collected a fairly limited range of expressions. If you compare it to a typical FACS shoot, for recreating a photorealistic human you could shoot as many as 100+ expressions in order to reach the necessary level of realism for a ‘digi-double’ character.
After all the data was processed, I went on to clean up the neutral pose. First using Wrap3 to get a clean topology onto the scan, then working in ZBrush to clean up the model and add in any extra geometry such as; eyes, teeth, caruncula, etc.
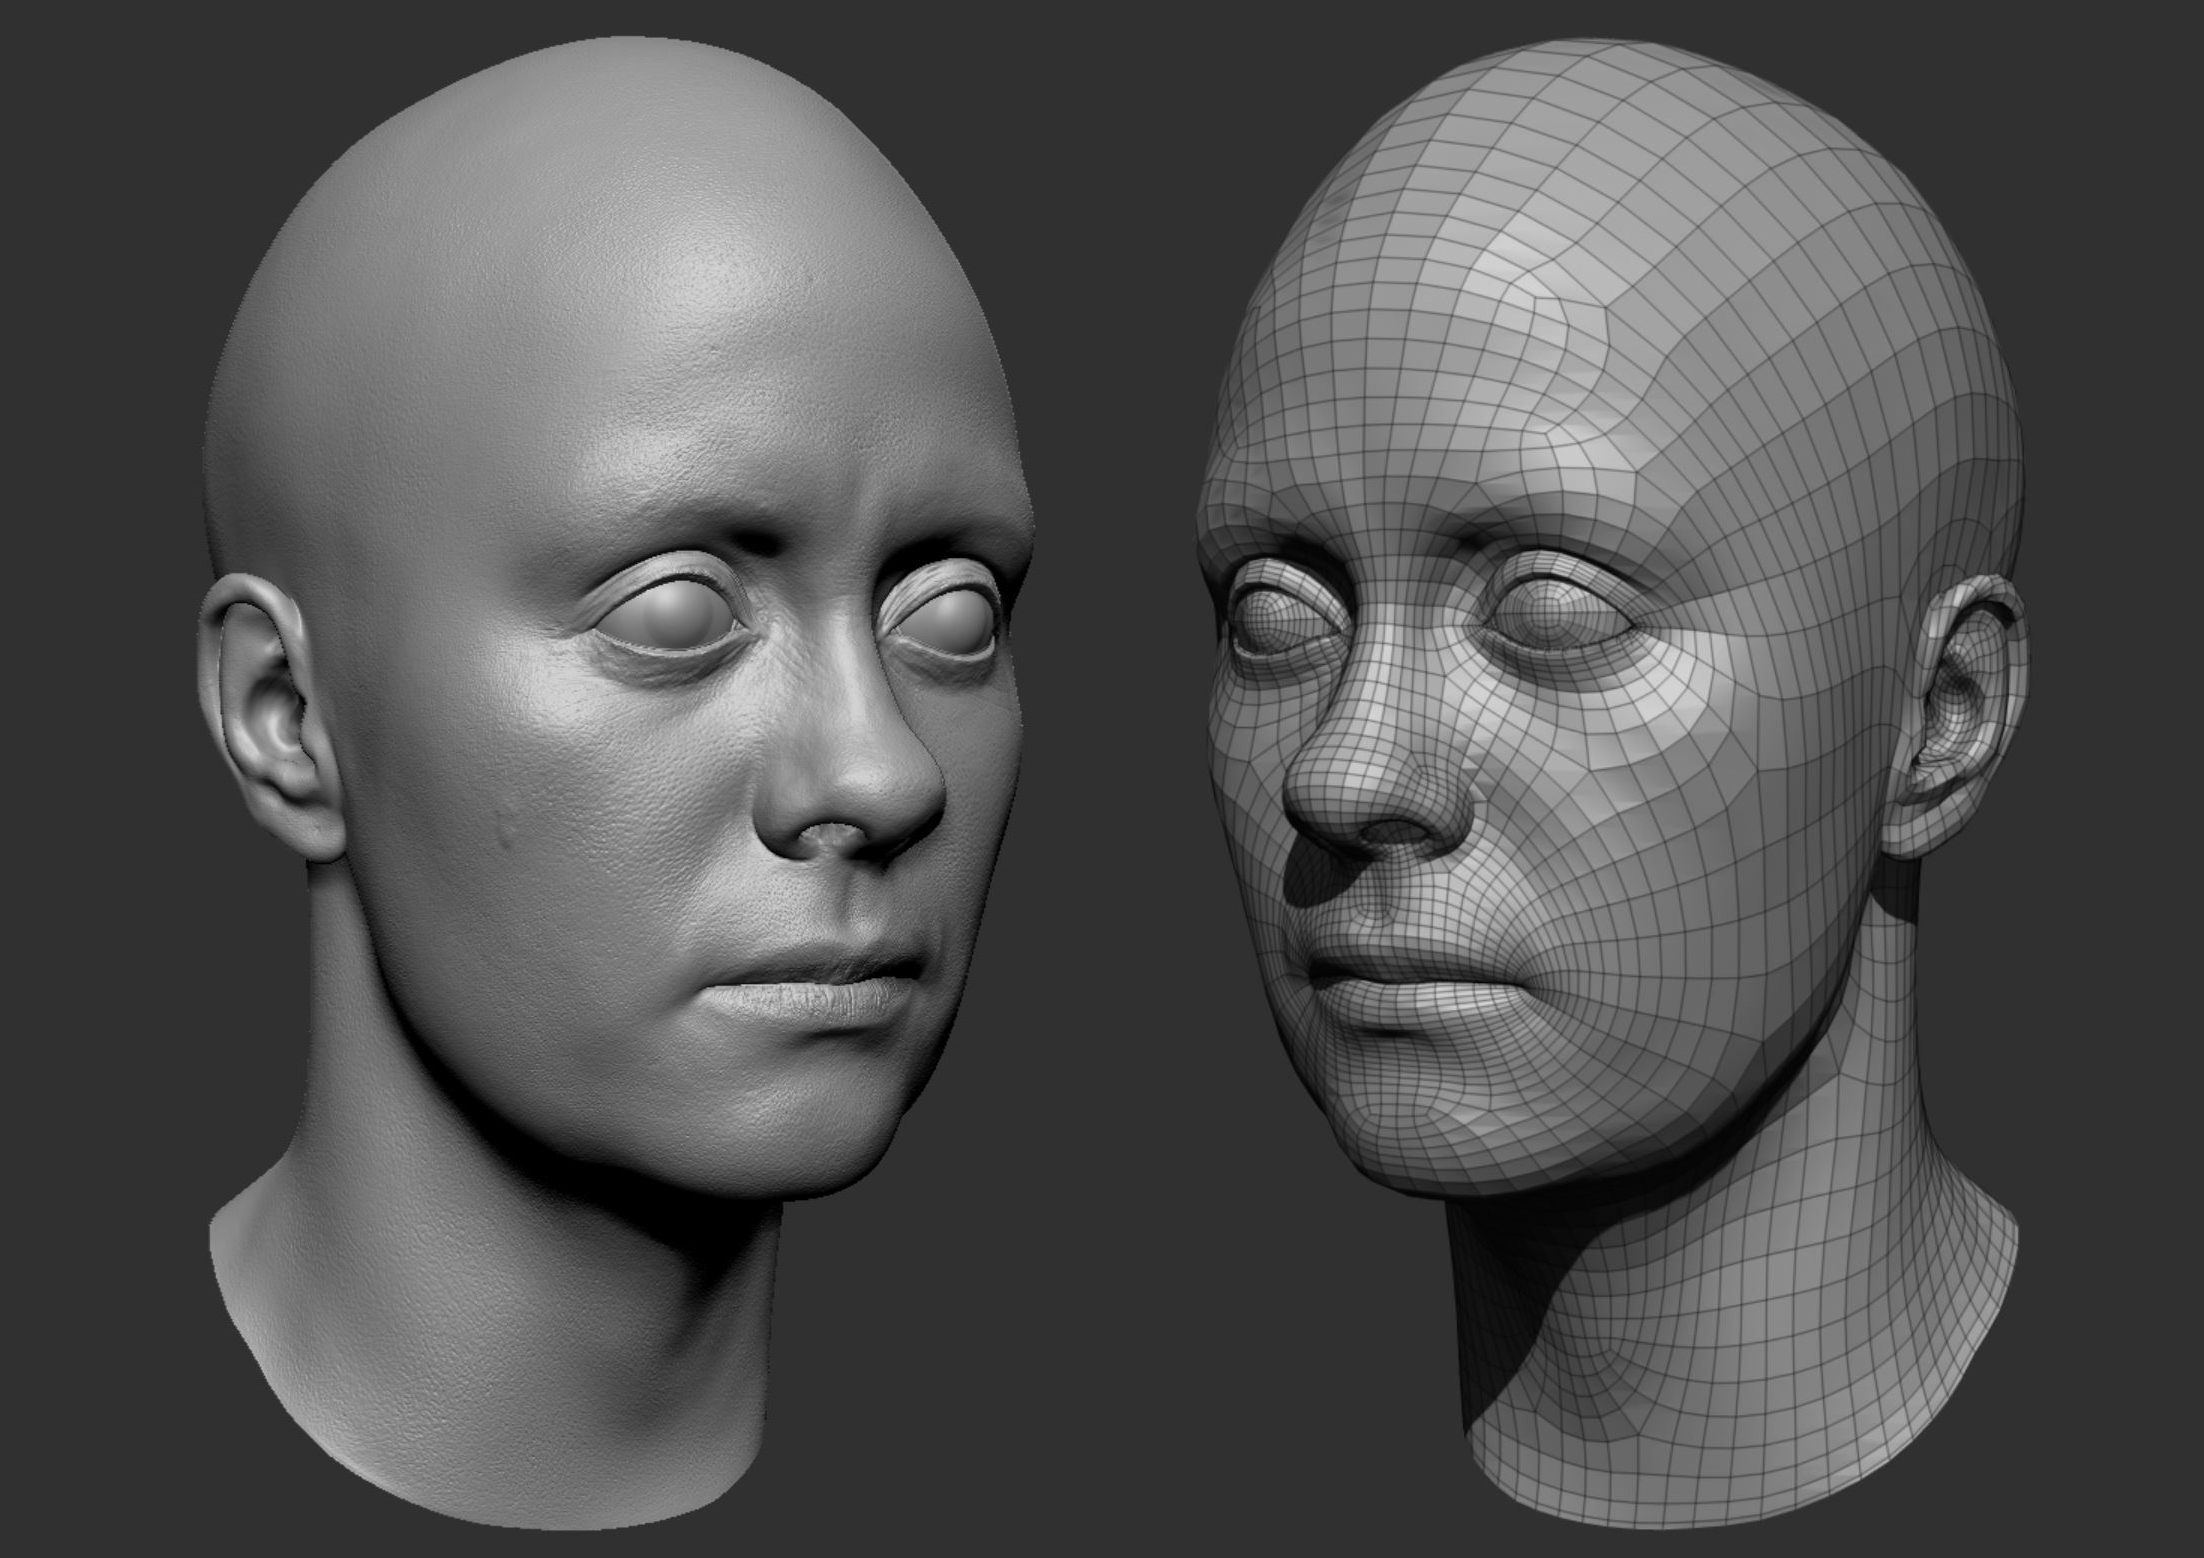
I then went through each pose and isolated the areas of deformation that would be required for combining the FACS into the facial rig. I have only selected a small set of expressions to combine with the rig, but for the purpose of this test they should work well.
Facial Rigging
The most common purpose of a FACS shoot is to provide a character rigger with enough reference to build a rig that can perform exactly like the actor/model that is being recreated. For this reason, it helps to have some knowledge of facial rigging for this pipeline to work well. Personally this is not my area of expertise, so I thought I would use this opportunity to have a go at learning it.
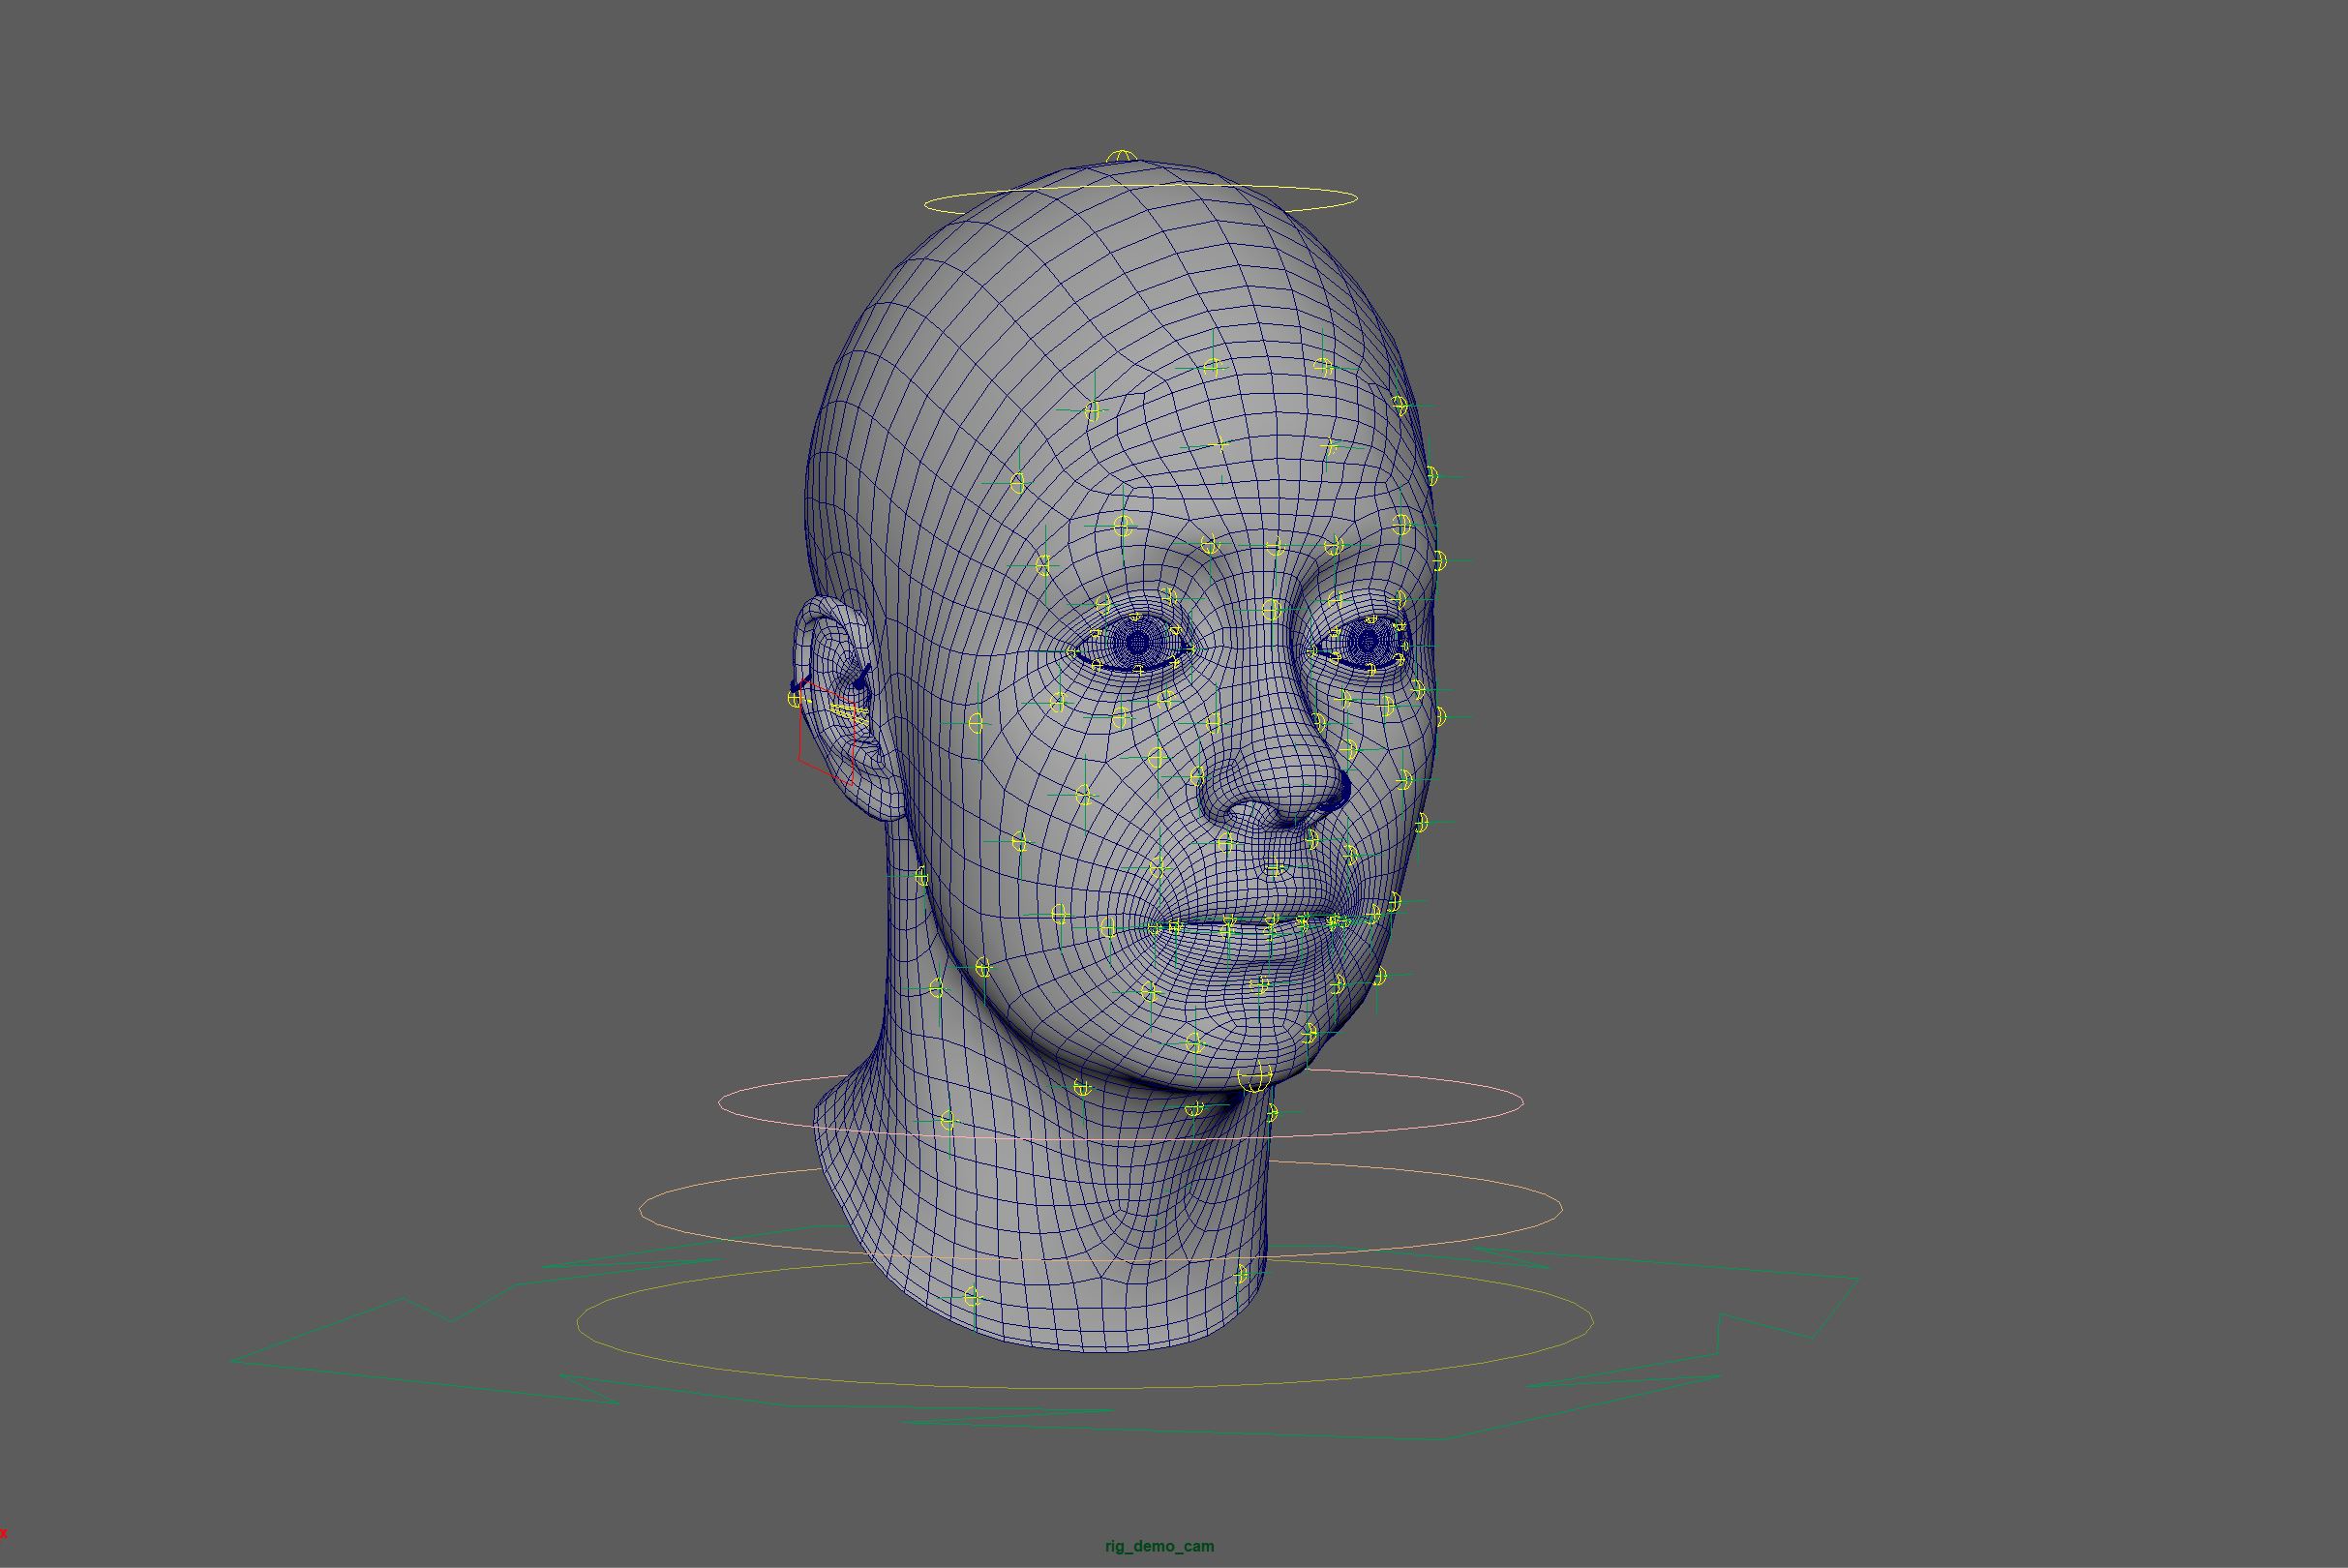
When combining all the expressions into one controllable character, you can begin by setting up a joint based facial rig (above), in which corrective shapes (extracted from the FACS data) are triggered to help achieve some of the more difficult facial expressions. If you haven’t heard of ‘joint based facial rigging’, I would recommend watching a course called Character Facial Rigging with Judd Simantov. It is a beginner/intermediate course where you can get a really good introduction to rigging techniques using joints, set driven keys and corrective blend shapes to achieve a fully functioning facial rig.
See below a work-in-progress demo of my facial rig in action.
Look Dev.
When working with human scans I rarely get the opportunity to take them as far as the look dev stage. However, on this occasion I thought I would see how far I could take her as a 3D character, and how much realism I could achieve.
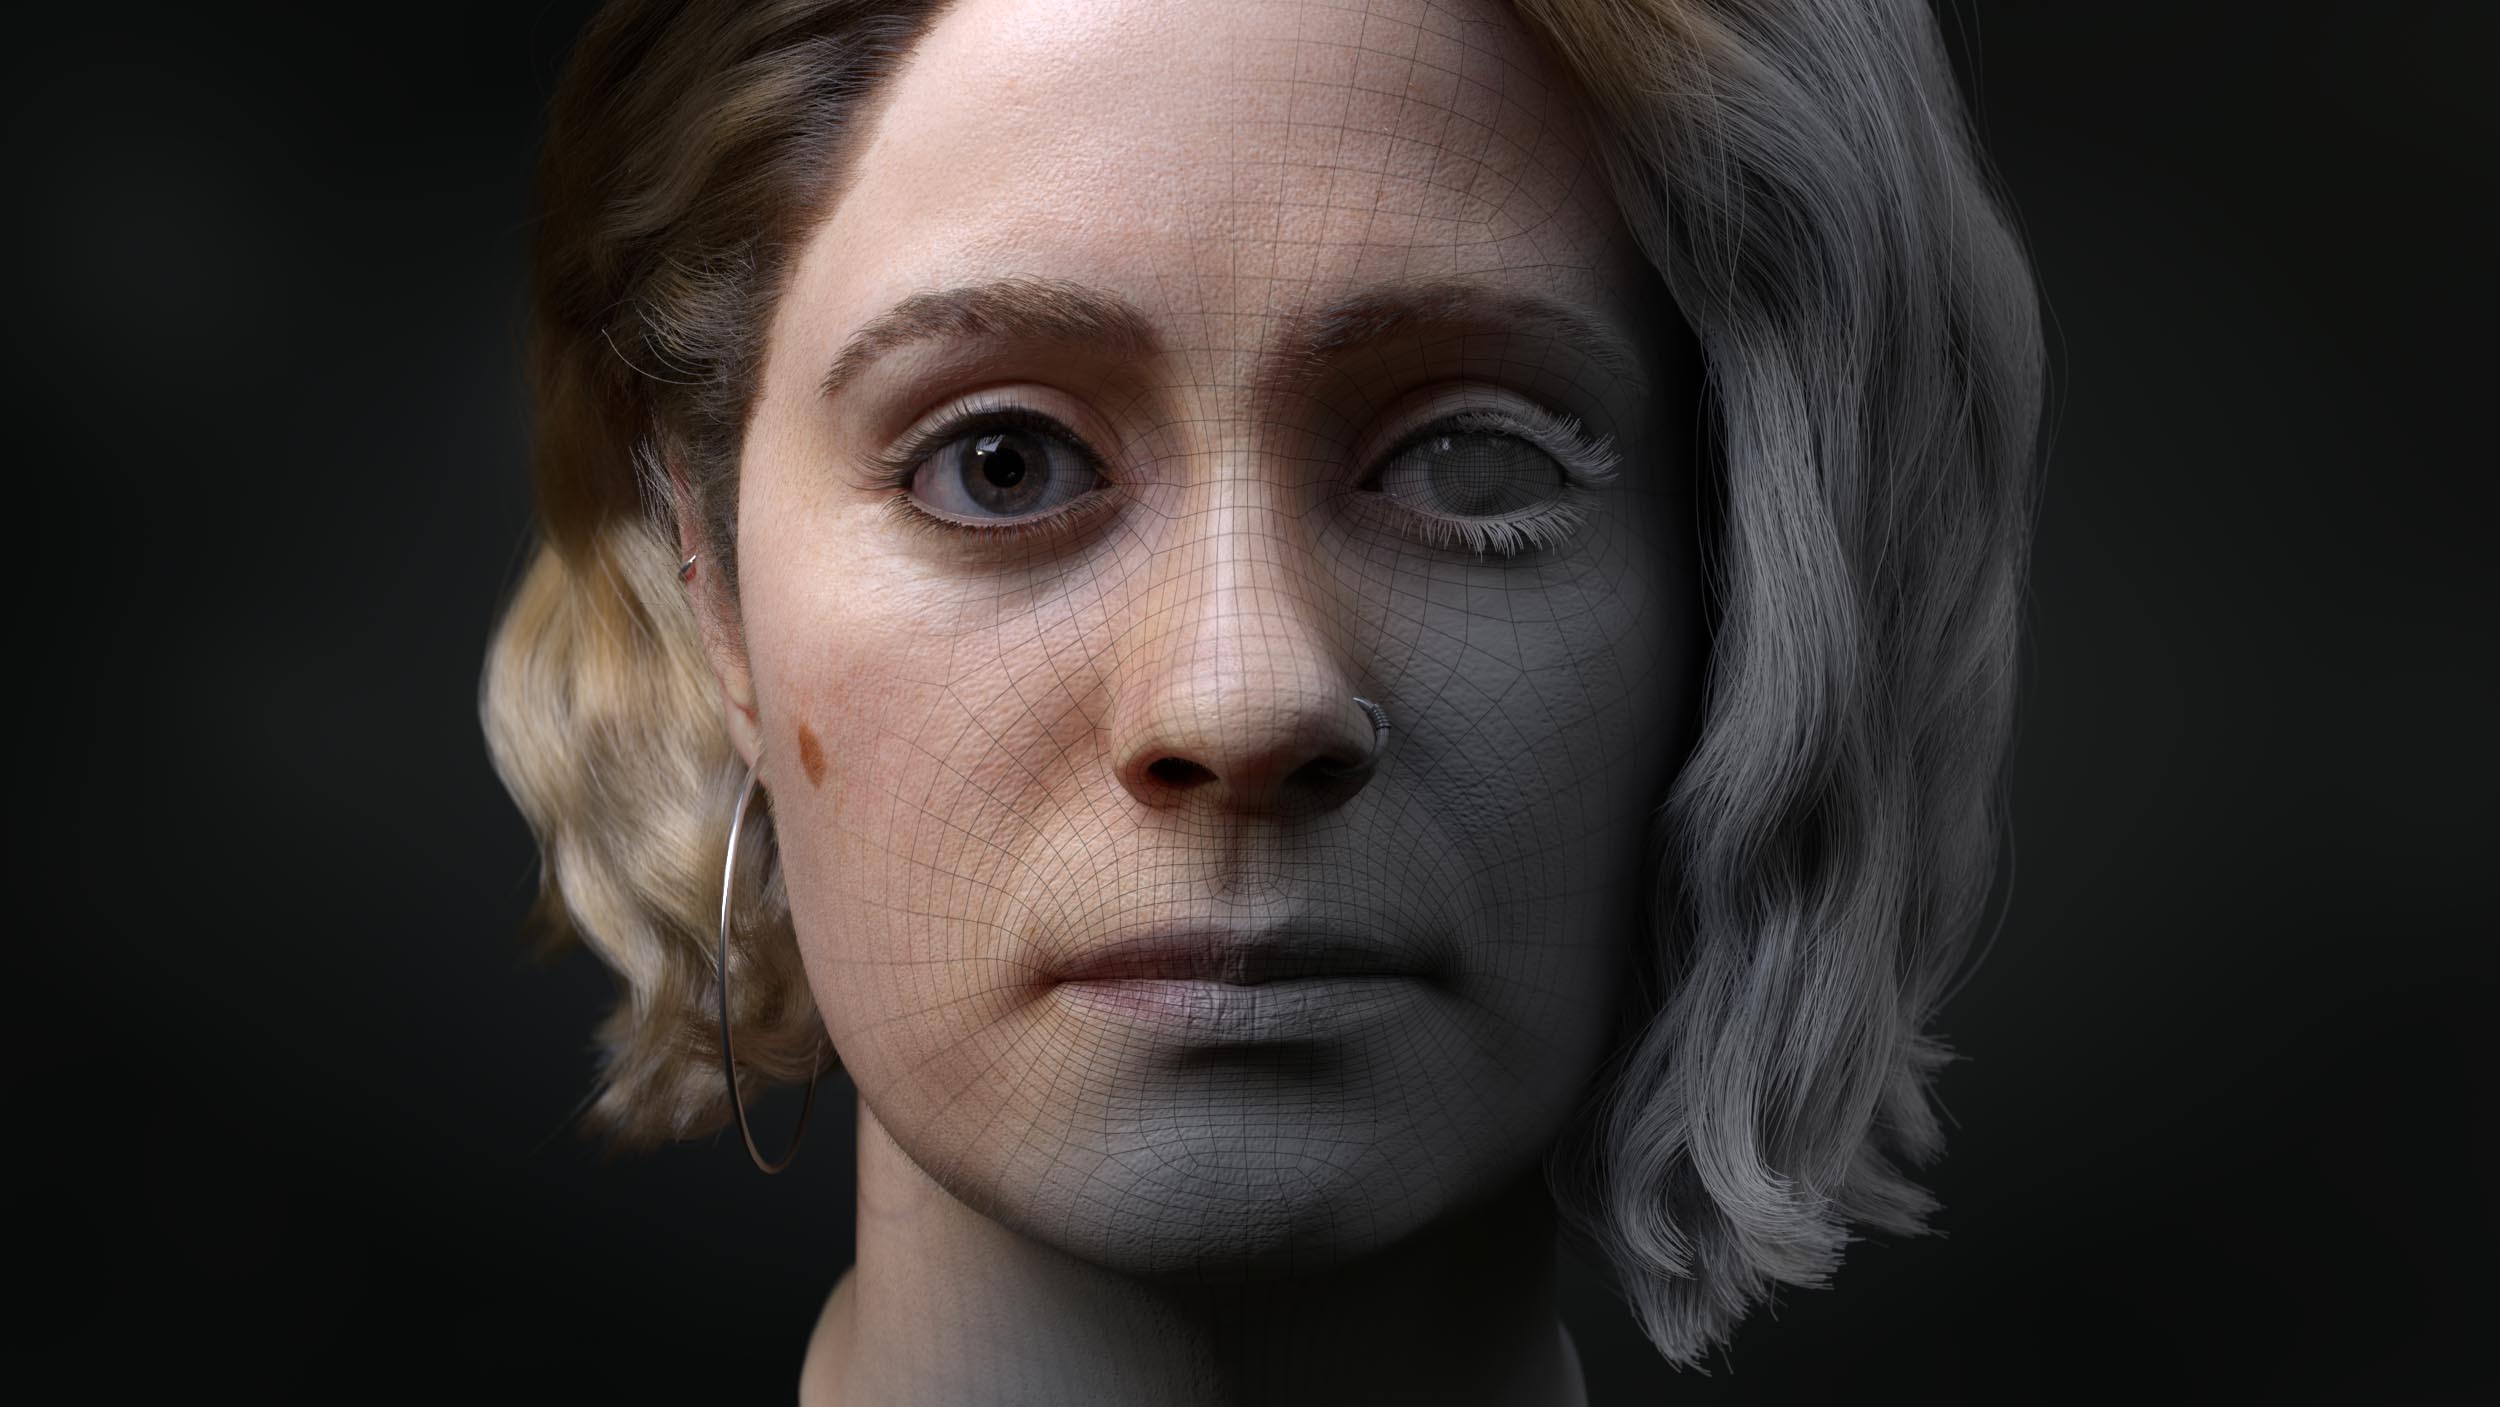
For rendering her I used Arnold 5 and the new aiSurface shader setup, which I found much nicer to use than the aiStandard shader in early versions of the plugin. The hair took me a while to learn, after trying out almost every different hair plugin available for Maya, I decided to stick with Xgen. I split the hair up into multiple sections; long hair, brows, lashes, peach fuzz, etc. The peach fuzz is great as it helps break up the skin surface and adds that extra level of realism.
It was pretty difficult to learn Xgen. The plugin itself is brilliant, however I found there were very few resources out there that could take you end-to-end through the pipeline for a long haired groom. One resource that I found very helpful was Jesus Fernandez’s tutorials – worth a look if you are just starting out like myself. Despite groom not being my area of expertise, I was still pretty happy with the results for a first attempt. Next time I revisit Xgen, I might look at doing a short haired male character to help make the learning process easier and hopefully I can perfect the workflow.
See below the final renders.
To take this test piece further I would like to go in and better refine her hair. Also, I have recently learnt a more advanced workflow for surfacing in ZBrush, which would help improve the pore details and create a more realistic finish. For anyone interested in this workflow, have a look at Kris Costa’s presentation on realistic portraiture at the 2018 ZBrush Summit 2018
Despite there being many improvements I could make to this character, I am pretty happy with how she’s looking. The project has been a big learning experience helping me get to grips with a few unknown areas such as groom and facial rigging. I hope some of you reading have found this post interesting and it has helped shed some light on the FACS pipeline for anyone looking to learn the workflow.
As always, feel free to leave a comment if you have any questions or feedback on anything I have mentioned in this post.
5 thoughts on “Single Camera FACS Scanning | Photogrammetry”
Amazing work Adam.
Thanks Rick!
Hello Adam,
what do you know so far? Is FACS (when you change the F for Face to B for Bodyy) also usable for capturing all possible body “expressions”?
So I think the bodyshapes had to be sticked to the single body bones – like the face expressions to the skull.
At least it would be interesting if it is possible let’s say with the upper arm.
Best
Matthias
Awesome work and very insightful. Do you happen to add a mouth bag as a separate mesh to the base mesh or its added to the base mesh? Also, I will be much interested in how the targets are been set up in the working rig you shared.
Awesome work once again.
Awesome work and very insightful. Do you happen to add a mouth bag as a separate mesh to the base mesh or its added to the base mesh? Also, I will be much interested in how the targets are been set up in the working rig you shared.
Comments are closed.